How to Demo a Shower Stall
Time for the old walk-in to go? Make way for a relaxing rainfall oasis with our easy shower removal guide.

DIY Shower Demolition Guide
So, you want to remove your shower. Whether it’s made of tile, fiberglass or another material, demolishing a shower isn’t as hard of a task as you might think. Our guide walks you through the ins and outs of removing a shower — from step-by-step instructions for removing fixtures, door frames, shower heads and drain pans to specific advice to demolish tile and fiberglass walls.
Need to remove a shower and bathtub combo? We have a guide for that too. Check out our in-depth tutorial to learn how to remove a bathtub.
Shower Demo FAQs
How long does it take to rip out a shower?
It typically takes about three to five days to replace a shower. The project time frame may vary depending on the upgrades you choose to install. For instance, if you are adding new tile or installing a second showerhead, you should estimate a few more days to finish the job.
How much does it cost to rip out a shower and replace it?
The average cost of replacing your shower and removing the old unit is $1,200 to $6,350. The wide price range accounts for the variety of material options, from low-maintenance acrylic or fiberglass to top-of-the-line granite walls. Keep in mind that material costs can fluctuate based on demand and delivery times.
How hard is it to replace a shower stall?
Removing a shower stall is relatively easy for the average DIYer. The most difficult part of the job is getting the old debris through doorways. To streamline this process, we suggest cutting the panels into manageable pieces. Then, you can safely toss the debris in your dumpster rental.
When should I replace my shower?
It's time to replace your shower if you notice changes in water pressure, persistent leaks or evidence of water damage. Besides the obvious wear and tear to your old shower, it may simply be time to modernize the bathroom with new materials. Many people also make shower modifications for aging in place.
How do you remove glued on shower walls?
Glued vinyl shower sheets can be removed from concrete walls using a joint knife and a chemical wallpaper remover. Cut into the top corner of the vinyl sheet, then pry it away until you can get a grip on it. Use pliers if you have trouble. Then, apply the liquid or gel wallpaper remover to help dissolve the adhesive. Follow instructions on the label to give the product enough time to loosen the adhesive, then scrape it away with a putty knife.
How to Remove a Shower in 6 Steps
Showers need replacing from time to time, whether it's starting to show its age or you want to install different wall materials. Whatever your reason, the steps to demo a shower are easy enough to DIY.
Step 1: Plan for the Work Ahead and Prepare the Area
Before you can get started, gather all the appropriate tools. Luckily, everything you need is part of your standard tool kit.
Tools | Supplies |
|---|---|
Adjustable wrench | Broom and dustpan |
Chisel | Bucket |
Hammer | Dust mask |
Pry bar | Floor coverings |
Reciprocating saw | Gloves |
Screwdrivers | Goggles |
Utility knife | Towels |
It's also important to plan for waste removal because, no matter what size space you're renovating, debris piles up fast. Unfortunately, most cities don’t accept construction debris curbside. In the rare instance that they do, it’s often considered bulk waste due to the weight of the debris. Typically, you'd have to spread the debris across several weeks to avoid fines from the city.
If you want to clean as you work and get the debris off your property as soon as you’re done, consider renting a dumpster.
Next, get the bathroom ready for the mess you’re about to make. Place floor coverings directly outside of the shower and on countertops or other surfaces to protect from dust — shower removal can be very messy.
Once that’s done, it’s time to shut off the water. There are two spots in the bathroom where you can turn the water off: the valve leading to the shower or the valve leading to the bathroom. If you can’t access either of those spots, you’ll need to shut off the main valve. It’s near the water company meter and often located in the basement or by the hot water tank.
Pro Tip
After the water is shut off, you need to relieve the pressure in the pipes. Do this by turning on a faucet closest to the main valve — as long as that faucet is in the shut-off portion of your home.
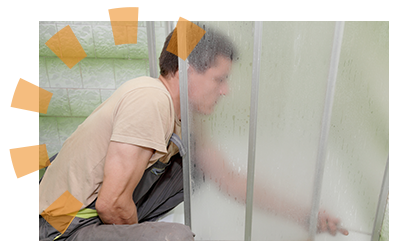
Step 2: Remove the Shower Doors
If you have a shower/tub combo, this step is easy — simply remove the shower curtain and hooks. For showers with an enclosure, here are detailed steps to remove two standard door types: hinged and sliding.
How to Remove a Hinged Shower Door
- Simply unscrew the fasteners that connect to either the wall or frame until the door is detached.
How to Remove a Single or Dual Sliding Door System
- Grab the door on both sides and lift it up until you can swing the bottom of the door out of the track.
- Tilt the door until you feel the wheels slip from the upper track.
- Remove the door and place it to the side, repeating the process on the second door if necessary.
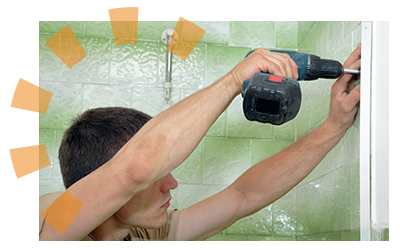
Step 3: Pull the Frame Off
Once the door is out, it’s time to remove the shower door frame. This can be accomplished in four easy steps:
- Remove the top rail by lifting it up. You may need to use a utility knife to score any caulk holding it in place.
- Unscrew the fasteners holding the side frames to the wall and bottom track to the shower floor.
- Cut through any caulk or adhesive holding the frames in place.
- Pull the side frames from the wall and floor.
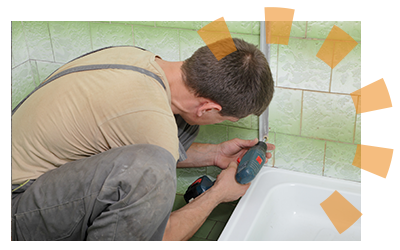
Step 4: Detach Fixtures
Take out any fixtures that would get in the way while removing the shower walls. Items like soap holders, towel racks and drain covers can be detached by removing any caulk or adhesive with a screwdriver and utility knife. The two items that can be more complex are the shower head and water controls. They involve a bit more work simply because they connect directly to the piping.
How to Remove a Shower Head
- Loosen the connecting nut from the pipe with an adjustable wrench.
- Turn the shower head by hand until it comes off.
- Rotate the shower arm until it comes off.
- Remove the escutcheon — the decorative, circular metal piece that covers the hole where the shower arm enters the wall — with a pry bar if it didn’t come off with the shower arm.
How to Remove a Shower Handle
- Locate the screw holding the control in place. Most lever designs will have a screw underneath, while knob designs usually require you to pop a cap off with a screwdriver first. Locate a logo on the knob and the screw is usually behind it.
- Spray some lubricant on the screw to loosen any mineralization.
- Remove the screw.
- Pull on the knob or lever until it comes off the valve stem.
- Remove any cover that surrounded the controls.
Step 5: Cut and Remove Shower Walls
Nice work. Your shower is now in its most basic state — three walls, a floor and a couple of pipes. Now comes the hardest part: removing the shower walls.
There are two main types of walls, each requiring different demo methods. Don’t worry. We’ll go into detail about how to remove both tile and fiberglass shower walls.
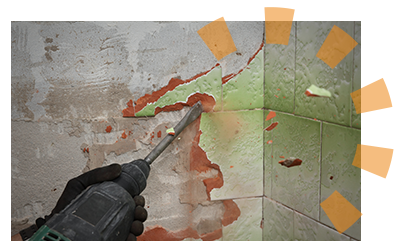
How to Remove Tiled Shower Walls
Keep your bucket, hammer, pry bar, utility knife and reciprocating saw handy as you prepare to demo your tiled shower walls. Also, if you haven’t been using your goggles, dust mask and gloves, you’ll want to slip them on for this as there will be sharp edges and flying pieces of tile.
- Slice caulking along corners where the wall, ceiling or floor connect with your utility knife.
- Pry the tiles off along the middle row of the shower wall using your pry bar.
- Place the removed tiles into your bucket to take out to your dumpster later.
- Cut the seam where the tile meets the drywall with your reciprocating saw. Start from the bottom and cut up through the row of tile you removed earlier.
- Saw horizontally down the middle of the row where you removed the tiles until you reach a corner.
- Pry the bottom half of the wall free from the studs and set it aside.
- Repeat steps 4-6 for the top half of the wall.
- Repeat steps 1-7 for the remaining two walls.
How to Remove Plastic Shower Wall Panels
Grab your reciprocating saw and hammer and get ready to make a mess.
- Cut 5-6 inches of the surrounding drywall. Be sure not to cut too deep and damage the studs.
- Knock out the drywall between your cut and the top of the fiberglass wall with your hammer, which should reveal all of your nail or screw attachments.
- Look behind your shower walls and note where any plumbing, gas or electrical lines are so that you can avoid them. There are also plenty of cell phone apps to help with this process.
- Cut through the corners of your walls vertically. Start at the top and work down until you are about three inches from the floor.
- Cut each wall horizontally three inches from the floor, connecting with your vertical cuts to form three distinct fiberglass panels.
- Remove the fasteners attaching your fiberglass panels to the studs.
- Repeat on all three sides.
- Take your panels and toss them in the dumpster.
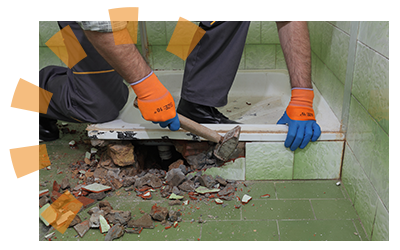
Step 6: Pry the Shower Floor Loose
One last step before your shower demolition is complete. As with the walls, there are two types of shower floors you may have: fiberglass and tile. If your floor is tile, we have you covered with our step-by-step tile removal tutorial. Since fiberglass is the most common shower pan, we’ll focus on that material here.
How to Remove a Shower Pan
- Remove fasteners like brackets, nails or screws that connect the shower pan to the studs.
- Slowly pry the rubber flange with a utility knife between the flange and shower pan where the drain pipe connects. This may be a slow process as it will only move a bit at a time.
- Continue until you feel the seal break, then pull the flange out and discard.
- Break and remove any caulk or adhesive between the bathroom floor and the shower pan.
- Wedge your pry bar between the bathroom floor and shower pan, then pry the shower floor up until it clears the drain pipe.
- Clear your shower floor from the area and toss it in your dumpster.
How to Remove a Shower Drain Cover
Drain gates can collect hair, soap scum and mineral deposits that keep water from draining. Here's how to get rid of your old one.
- Find the screws that connect the drain gate to the flange.
- Use a screwdriver to loosen the screws, then lift off the gate.
- For drain covers without screws, use a flathead screwdriver or needle-nose pliers to pry it off.
How to Remove a Shower Drain Body
- After taking off the drain cover, use needle-nose pliers to remove the crown nut.
- Pull out the compression seal to expose the drain pipe and shower drain body.
- Make two cuts into the drain body with a mini hacksaw about one inch apart. Do not cut the shower pan or drain pipe during this step.
- Break this small one-inch part of the flange free from the shower pan with your flathead screwdriver.
- Squeeze and remove the remaining piece of the shower drain. Keep the nut and washer attached as you pull away.
Demo Tip
Do you have a shower and bathtub combo to get rid of? Learn how to remove a bathtub with our in-depth guide.

You're One Step Closer to Your Dream Bathroom
Now that your shower is removed, what’s the next step? Whether you’re putting a new shower in the spot, converting to a tub or just completing a step in your total bathroom renovation, removing one of the biggest items in the room is a great step towards the bathroom you’ve always wanted.
Need some guidance on other bathroom demolition projects? Check out our step-by-step instructions on how to demo a vanity and toilet removal to keep your project moving.
Other Sources
How Much Does Shower Installation Or Replacement Cost? (2022, June 09). Retrieved from HomeAdvisor.com
Kazanci, S. (2021, May 21). Shower Remodeling: How Long Does It Take to Replace a Shower? Retrieved from Fairfaxkitchenandbath.com
Durrani, A. (2021, July 19). Towels, Toilets, and More: Here’s How Often Things in Your Bathroom Should Be Replaced. Retrieved from Realtor.com
What Do You Think?
Tearing out your old shower? Tell us about it. Head over to Twitter or Facebook,
and use #dumpstersblog to join the conversation.
Next Up


