How to Replace a Ceiling: An Easy 10-Step Guide
Learn how to tear the drywall out from above your head before it becomes a drop-ceiling.

Remove and Replace a Drywall Ceiling Yourself
Drywall ceilings are made to last a long time. However, you could be just one unexpected pipe leak away from needing to repair or replace yours. Even if you need to hire a pro to handle pipe and ceiling joist repair, removing and replacing the drywall ceiling yourself could save on overall project costs.
Whether you simply want a new look to your ceiling or you’re trying to fix a water leak or pesky rodent issue, we’ve put together a step-by-step guide to tear out your drywall ceilings and replace them.
Ceiling Replacement FAQs
Can you remove a drywall ceiling without damaging walls?
Yes. Take a utility knife and score the drywall ceiling where it meets a wall. This will help reduce any connection between the two surfaces. Also, be gentle when pulling drywall near a scored line and take care when pulling down drywall near a wall so that it doesn’t crash into it and cause a hole.
How much does it cost to redo a drywall ceiling?
The cost depends on the size of your room and the material prices at the time of your project. However, the national average for drywall ceiling replacement is $1 - $2 per square foot.
How long does it take to remove and replace a drywall ceiling?
Depending on the size of the room, it should take 1 - 2 days to complete the project.
Step 1: Gather Your Tools
To remove drywall, all you should need are simple supplies found in a basic toolkit. To install the new drywall ceiling, you may need to rent some special tools from your nearest Lowe’s or Home Depot.
If at any point you don’t feel comfortable using a tool or completing the project yourself, you should consider hiring a contractor to complete the job.

Tools | Supplies |
|---|---|
Hammer | Safety goggles |
Stud finder | Hard hat |
Screwdriver | Work gloves |
Power drill | Face mask |
Utility knife | Drop sheets |
Drywall lift | Ceiling-grade drywall |
Broom and dustpan | Drywall screws |
Marker/pencil | Masking tape |
Bucket/plastic tote | |
Drywall adhesive |

Step 2: Clear and Prep the Area
This project will create a lot of debris depending on the size of your ceiling, but also a considerable amount of dust. As a result, you’ll want to clear or cover your work area as much as possible. Anything that is hanging on the walls should be taken down. You’ll also want to remove furniture like bookshelves, chairs, tables and even lighter couches.
Once the room is cleared, lay your drop sheets on the floor from wall-to-wall. If you’re worried about them moving, tape them to the floors with masking tape or put a weight on the edges. Next, tape any wall vents closed with a breathable cloth. Finally, cut the power to the room at the breaker box.
Safety Tip
If your room has an unfinished attic above it, you’ll want to clear out any items you have stored up there at this point, too. Otherwise, they may tumble down as you remove the ceiling drywall panels.
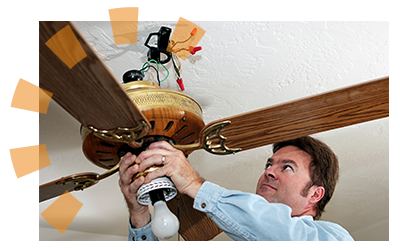
Step 3: Remove Fixtures
You’ve cleared the walls and floors, now it’s time to take down anything hanging from the ceiling. This may include ceiling fans, vent registers, hanging lights or recessed lighting frames.
Grab your screwdriver and utility knife and get to work. Use the utility knife to break any seals with the ceiling fixtures, whether it's caulk, paint or drywall joint compound. Then use the screwdriver to slowly loosen the fasteners, taking care to hold the fixture so it doesn’t fall to the floor.
Step 4: Score the Ceiling Edges
Fun fact: ceiling and wall drywall don’t connect, even if it appears that they do. Instead, materials like drywall tape and joint compound, along with paint, give the transition between the two surfaces a seamless appearance.
You’ll need to break that seam in order to start removing your ceiling.
Use a utility knife to slice the seam along the edges of your ceiling. If you hit drywall, it’s not a problem. However, don’t try to cut all the way through it — you might actually be hitting a joist, plumbing pipe or vent. The goal is to break the seal so that when you are pulling down the ceiling drywall later, you can prevent paint on the walls from chipping.

Step 5: Locate Ceiling Joists
Your drywall will be fastened to the joists above. However, if you have any texture or paint on the ceiling, chances are you won’t see the drywall nails or screws.
Grab your stud finder and locate a joist. Mark the location with a marker or pencil. Then, move your stud finder either directly backward or to one side from the mark. Whichever direction continues to indicate a stud will let you know which way your joists are running. Draw an arrow from the mark indicating the direction of the joists.
Keep in Mind
The standard distance between ceiling joists is 16 - 24 inches. Once you’ve located your first one and determined the direction it’s running, search for the next joist about 16 inches away.
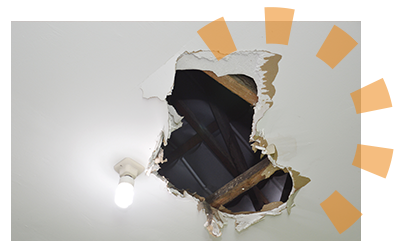
Step 6: Break a Hole
Now that you have a joist map drawn on your ceiling, you can get to the fun part: punching a hole in your drywall.
Grab your hammer and gently break through a section of ceiling between joists. It’s important that you do this carefully and with a light touch — you don’t know what’s directly above the ceiling. It could be empty space or insulation, or you could strike a fragile water pipe or air duct.
Once you have a small hole created, begin to slowly widen it until it’s big enough that you can fit both hands in — just make sure you have your gloves on first to avoid splinters and scratches.
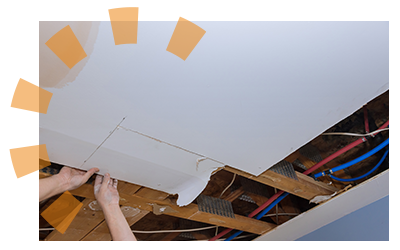
Step 7: Pull Down the Drywall
Strap on your hard hat and goggles. It’s about to get dusty.
Starting with the hole you created, begin tearing the ceiling drywall down. It will come in chunks as you pull with your hands. Drop the pieces right on the ground — you’ll clean it all up later.
Be sure to watch for stray nails as you pull the chunks off the joists and don’t worry if there are still some nails or pieces attached. You’ll take care of those later. The key right now is to pull down all the sheets until you have only small chunks held on by the nails that didn’t come out.
Keep in Mind
If you've pulled your ceiling drywall down to repair a pipe or joists: Now that the full ceiling is exposed, it's time to get to work on that. While there might still be some insulation or nails hanging, as long as they aren't in the way they can be taken care of before you install the new drywall.
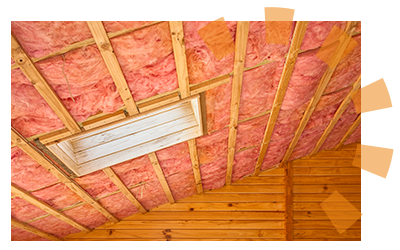
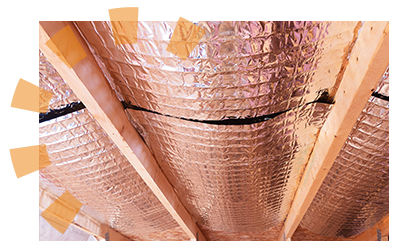
Step 8: Remove Insulation and Nails
Get back on your ladder and pull down any insulation that’s still stuck between the joists. While you’re up there, use your hammer to yank out any remaining nails. It’s best to drop these directly into a bucket or plastic tote to avoid stepping on them later.
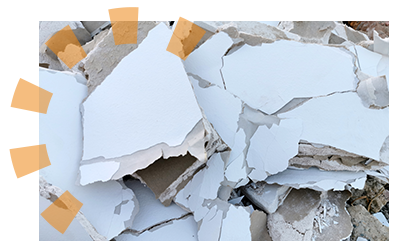
Step 9: Clear the Debris
It’s time to clean your mess. You’ll have various sized chunks of drywall, sheets of insulation and a bucket full of nails to dispose of. Get your contractor-sized garbage can ready, then consider which of these two common ways you’ll tackle this cleanup.
- Get the larger chunks of debris out of the way first, then the smaller pieces of drywall and insulation.
- Start in one spot and work your way across the room until it's cleared.
You’ll also want to give a sweep of the drop clothes to get rid of dust, tiny chunks of drywall and any nails that might have fallen.
Keep in Mind
Curbside pickup rarely accepts construction debris, including drywall. Usually, the easiest way to toss debris from this project is to rent a dumpster.

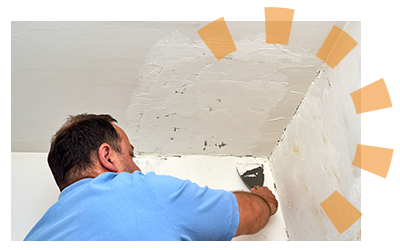
Step 10: Install New Drywall
It’s time to fill your newly created blank canvas. While the time spent on this step will be the longest, it’s only because you’ll need to take care and be precise to ensure you accurately install the ceiling.
How to Replace Ceiling Drywall
- Put drywall adhesive on the joists.
- Place insulation on top of your drywall sheets as needed.
- Press the drywall sheet against the joist with a drywall lift for about 10 seconds.
- Lightly mark any holes you need to cut for light fixtures and where joists are.
- Repeat steps 1-4 until your ceiling is covered.
- Drill or hammer your drywall nails/screws where you marked there are joists.
- Cut holes for your fixtures with a utility knife. Start small and widen as needed.
- Reinstall fixtures.
- Roll your drop clothes up and either toss them right into your dumpster or unroll and shake them out inside the container.
A Fresh Ceiling Brings the Room Together
The work is done. You’ve got a brand-new ceiling, plus the pride of replacing it yourself. Now that you’ve pulled back the ceiling veil, you know where the electric wires, water pipes and heating vents are in the ceiling — giving you inside knowledge on safe places to hang things from the ceiling or to diagnose any ceiling issues in the future. For now, though, sit back, relax and enjoy a job well-done.
What Do You Think?
Did a dumpster rental help make your project easier? We're listening. Head over to Twitter or Facebook,
and use #dumpstersblog to join the conversation.
Next Up


